The first time I pulled a tray of sweet and spicy baked cauliflower from the oven, the aroma was so bold it practically danced out the door and pulled my neighbors in. There’s something about roasting cauliflower with a sticky, tangy glaze – the edges go golden, the centers stay tender, and the flavors? Absolutely wild. I stumbled on this recipe during a week when I was desperate for something new, something exciting, but also healthy. You know those nights when you want takeout-level flavor but your body is craving veggies? That’s exactly how this sweet and spicy baked cauliflower came to life.
Honestly, I’ve lost count of how many times I’ve made this version, tweaking the sauce until it was perfectly balanced between sweet, heat, and a punch of umami. The best part is how this dish manages to be both comforting and a bit adventurous—just the thing for anyone who thinks cauliflower is boring (trust me, it’s not). Whether you’re serving veggie skeptics or looking to impress your foodie friends, this recipe delivers.
It’s quick to throw together, makes an epic side or even a main dish, and, bonus, it’s naturally gluten-free and vegan if you play your cards right. As someone who’s always seeking flavor-packed ways to eat more plants, this sweet and spicy baked cauliflower recipe is a staple in my kitchen. Keep reading if you’re ready to shake up your veggie game—you might just find yourself making it every week!
Why You’ll Love This Sweet and Spicy Baked Cauliflower
- Quick & Easy: This dish comes together in about 40 minutes, most of it hands-off roasting time. Perfect for busy weeknights or when you need a last-minute party snack.
- Simple Ingredients: No specialty store trips here—you’ll find everything at your regular grocery store (or probably in your pantry already!).
- Perfect for Any Occasion: It’s a standout at potlucks, a fun side for family dinners, and even works as a game day snack. I’ve even served it for brunch with eggs and toast.
- Crowd-Pleaser: Every time I make sweet and spicy baked cauliflower, someone asks for the recipe. Kids, adults, even the veggie skeptics—everyone goes back for seconds.
- Unbelievably Delicious: The glaze is perfectly sticky, with just the right kick of heat and a hint of sweetness. The cauliflower gets crisp-tender, soaking up all that flavor.
What sets this recipe apart is the double-bake technique: a quick roast to get the cauliflower tender, then a toss in the sweet and spicy glaze for a final bake that caramelizes everything to sticky perfection. No sad, soggy florets here! The sauce clings to every nook and cranny, making each bite pop with flavor.
Honestly, I think of it as the veggie version of your favorite takeout wings—just as crave-worthy, but so much lighter. And if you’re anything like me, you’ll love that it’s easy to riff on this recipe with whatever’s in your fridge. Comfort food, but with a twist. Trust me: once you try this sweet and spicy baked cauliflower, you’ll want to make it part of your regular rotation.
What Ingredients You Will Need
This recipe uses simple, wholesome ingredients to deliver bold flavor and satisfying texture—no complicated stuff, just a bunch of pantry staples and fresh cauliflower. Here’s what you’ll need:
- Cauliflower: 1 large head (about 2 pounds/900g), cut into bite-sized florets. Look for one that’s firm and creamy white. If you see brown spots, just trim them off. (Frozen works in a pinch—just thaw and pat dry!)
- Olive Oil: 2 tablespoons (30ml), for roasting. I prefer extra virgin, but avocado oil is great too.
- Cornstarch: 2 tablespoons (16g), helps the cauliflower get crisp and gives the glaze something to hold onto. Arrowroot powder or potato starch also work.
- Salt & Pepper: 1/2 teaspoon each, for seasoning.
For the Sweet and Spicy Glaze:
- Soy Sauce or Tamari: 3 tablespoons (45ml). Tamari makes it gluten-free.
- Maple Syrup or Honey: 2 tablespoons (30ml). Maple keeps it vegan; honey adds richness.
- Sriracha or Chili Garlic Sauce: 1-2 tablespoons (15-30ml), depending on your heat preference. You could use gochujang or your favorite hot sauce too.
- Rice Vinegar: 1 tablespoon (15ml), for a tangy kick. Apple cider vinegar works if that’s what you have.
- Garlic: 2 cloves, minced. I’ve also used garlic powder (1/2 teaspoon) in a pinch.
- Fresh Ginger: 1 teaspoon, grated. Skip it if you’re not a ginger fan, but I love the fresh zing.
- Sesame Oil: 1 teaspoon (5ml), optional but adds a lovely toasted note.
Optional for Garnish:
- Scallions: Sliced thin
- Sesame Seeds: Black or white, for crunch
- Chopped Cilantro: Fresh and bright, totally optional
- Lime Wedges: For squeezing on top (I love this for extra zip)
Ingredient Tips: For extra heat, add a pinch of red pepper flakes. If you need low-sodium, use reduced-salt soy sauce. Want to go oil-free? Try roasting with a bit of veggie broth instead of oil, but expect a little less crispiness. I’ve used both regular and gluten-free tamari with equally tasty results. If you’re avoiding corn, arrowroot powder works like a charm.
Equipment Needed
- Baking Sheet: A large, rimmed sheet pan is best for even roasting and caramelization. If you don’t have one, use two smaller sheets and rotate halfway through baking.
- Parchment Paper or Silicone Baking Mat: Makes cleanup a breeze and helps prevent sticking. (I’m a silicone mat fan—it’s reusable and eco-friendly!)
- Large Mixing Bowl: For tossing cauliflower with oil, cornstarch, and seasoning.
- Small Bowl or Measuring Cup: For mixing the glaze ingredients.
- Measuring Spoons and Cups: For accuracy—especially with the glaze. (I always keep a set of nesting spoons nearby.)
- Whisk or Fork: To blend the glaze until smooth.
- Sharp Knife and Cutting Board: For breaking down the cauliflower. If you’re in a rush, pre-cut florets from the store save time.
- Spatula or Tongs: For flipping and tossing the cauliflower on the sheet pan.
Pro Tip: If you’re using aluminum pans, line them to avoid sticking and staining. I’ve found that a silicone baking mat lasts ages with proper cleaning—just avoid cutting directly on it, and it’ll be your trusty roasting companion for years. Budget-friendly tip: parchment paper from the dollar store works just fine!
How to Make Sweet and Spicy Baked Cauliflower
-
Preheat and Prep:
Preheat your oven to 425°F (220°C). Line a large baking sheet with parchment paper or a silicone mat. This helps prevent sticking and makes cleanup easy. -
Prep the Cauliflower:
Wash and dry the cauliflower. Cut into bite-sized florets (about 1½ inches/4cm each). Try to keep them similar in size for even roasting.
Tip: Don’t toss the stems—they roast up just as tasty! -
Toss with Oil and Seasonings:
In a large bowl, combine the cauliflower florets, 2 tablespoons (30ml) olive oil, 2 tablespoons (16g) cornstarch, ½ teaspoon salt, and ½ teaspoon black pepper. Toss until the cauliflower is evenly coated. The cornstarch helps it get extra crispy in the oven.
Prep note: Make sure every floret is coated—this makes a big difference! -
First Bake:
Spread the cauliflower in a single layer on your prepared baking sheet. Roast for 20 minutes, flipping halfway. You want the edges to start turning golden and crispy.
Sensory cue: Your kitchen will smell amazing at this point! -
Make the Sweet and Spicy Glaze:
While the cauliflower roasts, whisk together 3 tablespoons (45ml) soy sauce or tamari, 2 tablespoons (30ml) maple syrup or honey, 1-2 tablespoons (15-30ml) sriracha or chili garlic sauce, 1 tablespoon (15ml) rice vinegar, 2 minced garlic cloves, 1 teaspoon grated ginger, and 1 teaspoon (5ml) sesame oil in a small bowl.
Troubleshooting: If your glaze is too thick, add a splash of water; too thin, simmer in a small pan to reduce. -
Toss and Second Bake:
Remove the partially roasted cauliflower from the oven. Pour the glaze over the florets and toss to coat evenly. Return to the oven and bake for another 10-15 minutes, until the glaze is bubbling and caramelized.
Warning: Watch closely in the last 5 minutes—sugar can burn fast! -
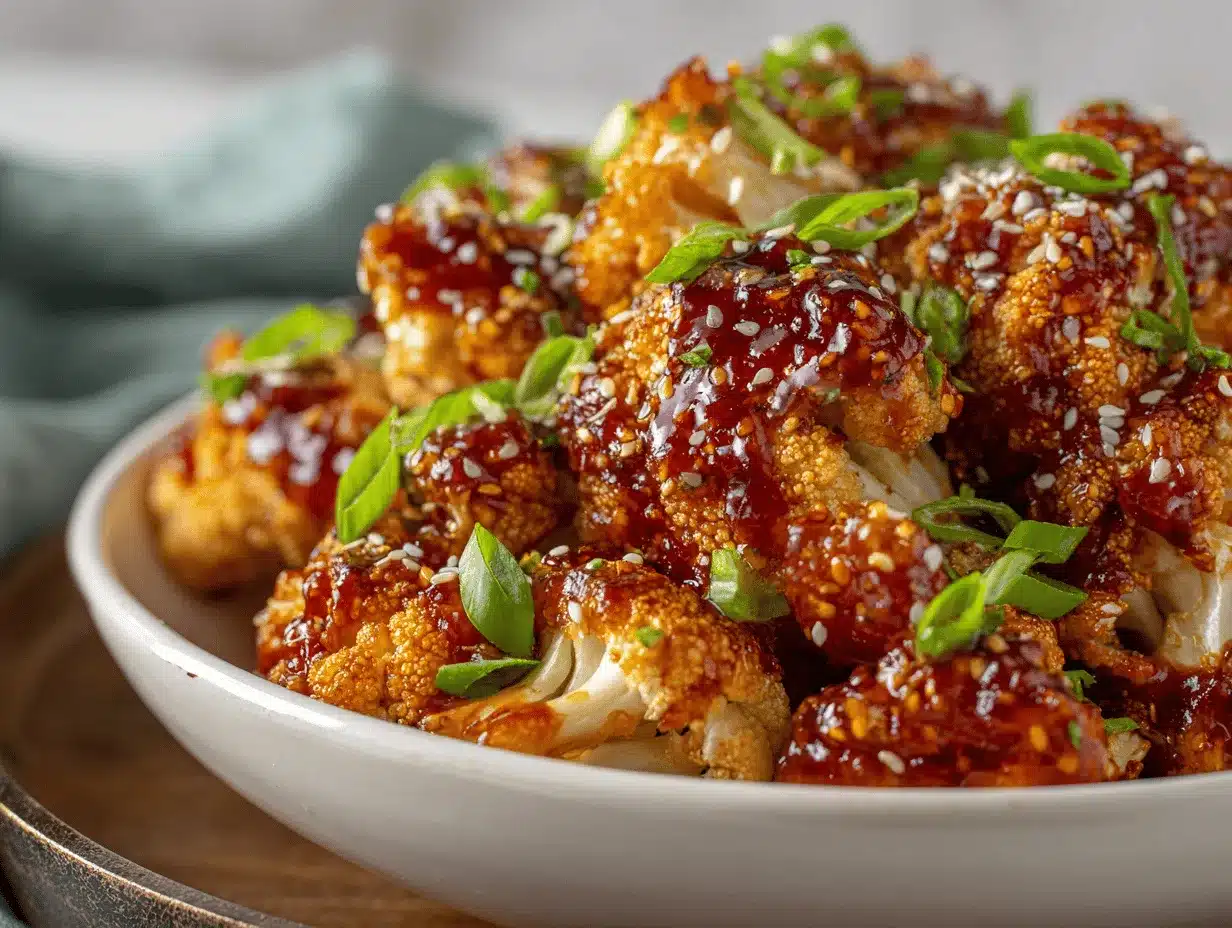
Final Touches:
Let the cauliflower rest for 5 minutes—the glaze will thicken as it cools. Transfer to a serving platter and sprinkle with scallions, sesame seeds, cilantro, and a squeeze of lime if you like.
Personal tip: I love it with extra chili flakes for more heat, but my kids prefer it milder.
If your cauliflower isn’t as crispy as you’d like, pop it under the broiler for 2-3 minutes at the end—but don’t walk away! Every oven is a little different, and I’ve learned the hard way that broiling can go from perfect to burnt in seconds. Enjoy the sizzle, the shine, and most of all, the flavor!
Cooking Tips & Techniques
- Don’t Crowd the Pan: If your cauliflower is packed too tightly, it’ll steam instead of roast. Use two pans if needed—it’s worth the extra dish.
- Flip Halfway: Flipping the cauliflower once during roasting helps it brown evenly on all sides. I use a wide spatula for this, but tongs also work great.
- Use Fresh Cauliflower: While frozen works, fresh florets roast up much crispier. If you do use frozen, thaw and blot with paper towels to remove extra moisture.
- Balance the Glaze: Taste the sauce before tossing—add more sriracha for heat, more maple for sweetness, or a splash more vinegar for tang. My first few tries were too spicy (rookie move), so don’t be shy about tweaking!
- Watch for Burning: The sugars in the glaze can go from caramelized to burnt quickly. Stay nearby during the second bake and check at the 10-minute mark.
- Batch Cooking: If you’re making a double batch, rotate the pans between oven racks halfway through for even roasting.
- Leftovers: The cauliflower will soften as it sits, but you can re-crisp it in a hot oven or air fryer for a few minutes. Just don’t microwave—trust me, it’s not the same!
Over the years, I’ve learned that patience pays off with roasted veggies. Letting the cauliflower get those deep golden edges is what makes this sweet and spicy baked cauliflower so irresistible. And honestly, a little imperfection is part of the charm—some bits get crispier than others, and that’s totally okay.
Variations & Adaptations
- Make it Gluten-Free: Use tamari or coconut aminos instead of regular soy sauce. I’ve done this for gluten-sensitive friends, and nobody could tell the difference.
- Air Fryer Option: Preheat your air fryer to 400°F (200°C). Cook the coated cauliflower in batches for 15-18 minutes, shaking halfway. Toss in glaze and air fry for another 3-4 minutes. Super crispy, super quick!
- Mild or Extra Spicy: Adjust the amount of sriracha or hot sauce to your taste. For kids, I swap half the hot sauce for ketchup and they love it.
- Low-Carb: Use a sugar-free syrup or monk fruit sweetener in place of maple syrup. I’ve tried this for friends watching carbs—still delicious!
- Different Veggies: Try this method with broccoli, Brussels sprouts, or even carrots cut into thick coins. I like mixing cauliflower and broccoli for a colorful platter.
- Nut-Free: No nuts in the sauce, but double-check your hot sauce and soy sauce labels if you have allergies.
One of my favorite twists is adding a handful of roasted cashews or peanuts for crunch. If you’re feeling wild, drizzle a little tahini over the top before serving. The possibilities are endless—don’t be afraid to make it your own!
Serving & Storage Suggestions
Sweet and spicy baked cauliflower is best enjoyed hot from the oven, when the glaze is glossy and the edges are crispy. I love serving it piled high on a platter, sprinkled with scallions, sesame seeds, and a squeeze of fresh lime juice. It’s stunning next to a bowl of jasmine rice or tucked into lettuce wraps for a fresh, hand-held meal.
Pair it with simple sides like steamed rice, quinoa, or even a crunchy slaw. For a heartier meal, serve alongside grilled chicken, tofu, or baked salmon. It also makes a fun appetizer with toothpicks for dipping into extra sauce.
To store, cool completely and refrigerate in an airtight container for up to 3 days. The cauliflower will soften, but you can revive it in a 425°F (220°C) oven for 8-10 minutes or in an air fryer for 3-5 minutes. I don’t recommend freezing—the texture just isn’t the same after thawing. The flavor, though, gets even deeper after a night in the fridge. Pro tip: leftovers make a killer addition to grain bowls or wraps!
Nutritional Information & Benefits
Each serving (about 1 cup) of sweet and spicy baked cauliflower has roughly 120 calories, 5g fat, 18g carbs, 3g protein, and 4g fiber. It’s loaded with vitamin C, potassium, and antioxidants from the cauliflower and ginger. The use of olive oil and sesame oil adds heart-healthy fats, while the glaze is naturally gluten-free and vegan-friendly if made with tamari and maple syrup.
This recipe is perfect for those on plant-based, gluten-free, or dairy-free diets. Allergy note: always check your sauces for potential allergens. I love that you can control the heat and sweetness, making it fit almost any eating style. Eating more veggies has never tasted so good!
Conclusion
If you’re looking for a veggie dish that’s anything but boring, this sweet and spicy baked cauliflower recipe is it. The flavors are bold, the edges are crispy, and it’s so easy to make—you’ll wonder why you didn’t try it sooner. I love how customizable it is, whether you want it mild or blazing, gluten-free or with your favorite twist.
Honestly, this is one of those recipes I make over and over because it just never disappoints. Give it a try, and don’t forget to make it your own—add your favorite toppings, switch up the sauce, or serve it in a creative way. I’d love to hear how yours turns out! Drop a comment below, share your version on social, or let me know what you paired it with.
Here’s to more flavorful, veggie-packed meals and plenty of happy bellies. Happy roasting!
FAQs About Sweet and Spicy Baked Cauliflower
Can I make sweet and spicy baked cauliflower ahead of time?
Yes! You can roast the cauliflower and make the glaze in advance. Store them separately, then toss and reheat in the oven to re-crisp before serving.
What can I use if I don’t have sriracha?
Any hot sauce you like works—chili garlic sauce, gochujang, or even a dash of cayenne in ketchup. Adjust to your heat preference!
Is this recipe suitable for meal prep?
Absolutely. Store cooled cauliflower in the fridge and reheat in the oven or air fryer. The flavor deepens as it sits, making leftovers even better.
Can I use frozen cauliflower?
You can, but be sure to thaw completely and pat dry to remove excess moisture. The result won’t be quite as crispy as fresh, but still tasty!
How do I make this dish less spicy for kids?
Use less hot sauce or swap half for ketchup or sweet chili sauce. The sweetness will balance out the heat, making it kid-friendly.
Pin This Recipe!
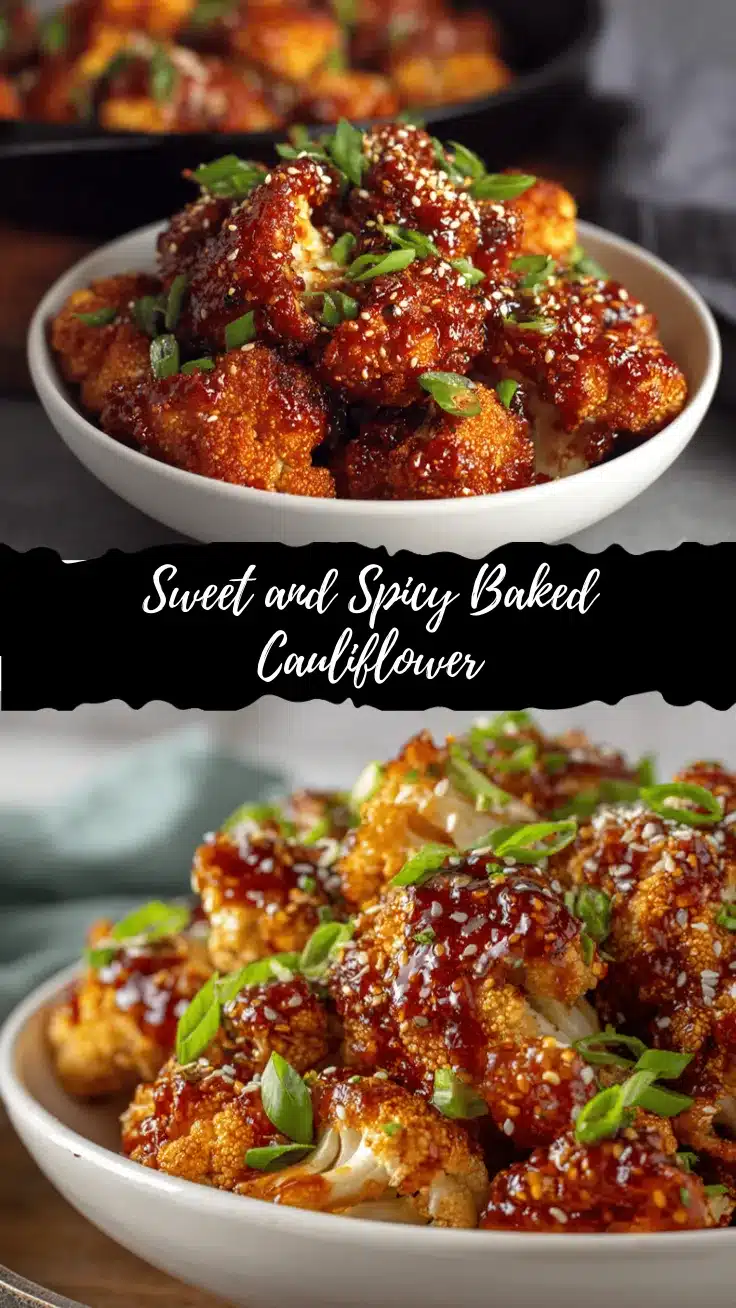

Sweet and Spicy Baked Cauliflower
- Total Time: 45 minutes
- Yield: 4 servings 1x
Description
This sweet and spicy baked cauliflower is roasted to golden perfection and tossed in a sticky, tangy glaze for a bold, flavor-packed veggie dish. It’s quick, easy, naturally gluten-free, and can be made vegan—perfect as a side, appetizer, or main.
Ingredients
- 1 large head cauliflower (about 2 pounds), cut into bite-sized florets
- 2 tablespoons olive oil
- 2 tablespoons cornstarch
- 1/2 teaspoon salt
- 1/2 teaspoon black pepper
- 3 tablespoons soy sauce or tamari
- 2 tablespoons maple syrup or honey
- 1–2 tablespoons sriracha or chili garlic sauce
- 1 tablespoon rice vinegar
- 2 cloves garlic, minced
- 1 teaspoon fresh ginger, grated
- 1 teaspoon sesame oil (optional)
- Scallions, sliced thin (for garnish, optional)
- Sesame seeds, black or white (for garnish, optional)
- Chopped cilantro (for garnish, optional)
- Lime wedges (for serving, optional)
Instructions
- Preheat your oven to 425°F (220°C). Line a large baking sheet with parchment paper or a silicone mat.
- Wash and dry the cauliflower. Cut into bite-sized florets, keeping them similar in size for even roasting.
- In a large bowl, toss cauliflower florets with olive oil, cornstarch, salt, and black pepper until evenly coated.
- Spread the cauliflower in a single layer on the prepared baking sheet. Roast for 20 minutes, flipping halfway through.
- While the cauliflower roasts, whisk together soy sauce or tamari, maple syrup or honey, sriracha or chili garlic sauce, rice vinegar, minced garlic, grated ginger, and sesame oil in a small bowl.
- Remove the cauliflower from the oven. Pour the glaze over the florets and toss to coat evenly.
- Return to the oven and bake for another 10-15 minutes, until the glaze is bubbling and caramelized. Watch closely in the last 5 minutes to prevent burning.
- Let the cauliflower rest for 5 minutes to allow the glaze to thicken. Transfer to a serving platter and garnish with scallions, sesame seeds, cilantro, and a squeeze of lime if desired.
- Serve hot. For extra crispiness, broil for 2-3 minutes at the end, watching carefully.
Notes
For extra crispiness, avoid crowding the pan and use fresh cauliflower if possible. Adjust the glaze to taste—more sriracha for heat, more maple for sweetness. Leftovers can be re-crisped in the oven or air fryer. Make it gluten-free with tamari and vegan with maple syrup. Try with other veggies like broccoli or Brussels sprouts.
- Prep Time: 15 minutes
- Cook Time: 30 minutes
- Category: Side Dish
- Cuisine: Asian-Inspired
Nutrition
- Serving Size: About 1 cup
- Calories: 120
- Sugar: 7
- Sodium: 600
- Fat: 5
- Saturated Fat: 0.7
- Carbohydrates: 18
- Fiber: 4
- Protein: 3
Keywords: baked cauliflower, sweet and spicy, vegan, gluten-free, roasted vegetables, healthy side, easy recipe, plant-based, spicy cauliflower, Asian cauliflower